Welcome to the WordPress localhost installation guide. In this tutorial, you will learn how to install and run WordPress on localhost (aka locally).
But that’s not all, if you stick to the end, I will teach you a couple of tricks to optimize your local environment for WordPress development.
Even if you are a seasoned WordPress developer, you should still find some useful bits here and there. It’s the ultimate guide for a reason!
Running WordPress locally is the ideal option to safely try out WordPress or even better, to start your WordPress development journey.
Let’s dive in!
What do You need to Run WordPress on Localhost?
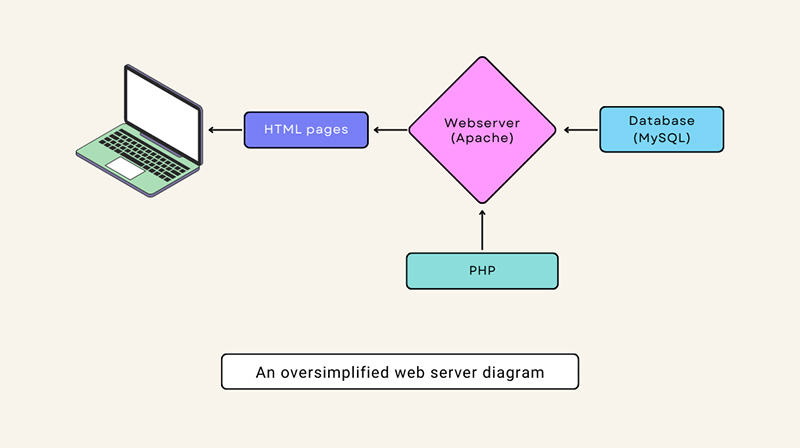
Just like running WordPress on a remote server, running it on localhost requires 3 key components; A web server like Apache or NGINX, PHP, and a MySQL database server.
To install these components on your machine to simulate a web hosting server, you have 2 options:
- You can install each component individually through a package manager and configure them to work together to serve web pages on localhost. This option is for advanced users and will require different instructions for different operating systems and versions.
- Or you can install a program that bundles the 3 together in one single package. This option is recommended for all users.
Best local web server software
Ok, so what program do you need to install? Here is a short list of the best web server software for hosting WordPress locally:
| Windows | Mac | Linux | |
|---|---|---|---|
| Xampp | Yes | Yes | Yes |
| LocalWP | Yes | Yes | Yes |
| Ampps | Yes | Yes | Yes |
| Devilbox | Yes | Yes | Yes |
| MAMP | Yes | Yes | No |
| WampServer | Yes | No | No |
| WAMP | Yes | No | No |
| Devserver by EasyPHP | Yes | No | No |
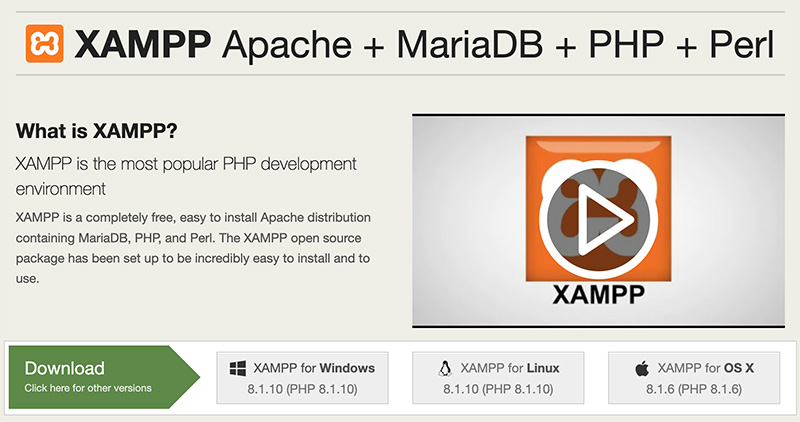
Out of all these programs, I prefer Xampp because it’s widely supported on Windows, Mac, and Linux and by far, the easiest to install and use.
How to Install Xampp on Your Computer?
How to Install Xampp on Windows or Mac?
Go to the Xampp website and download the correct installer for your operating system. Or go to the download page to download a specific version.
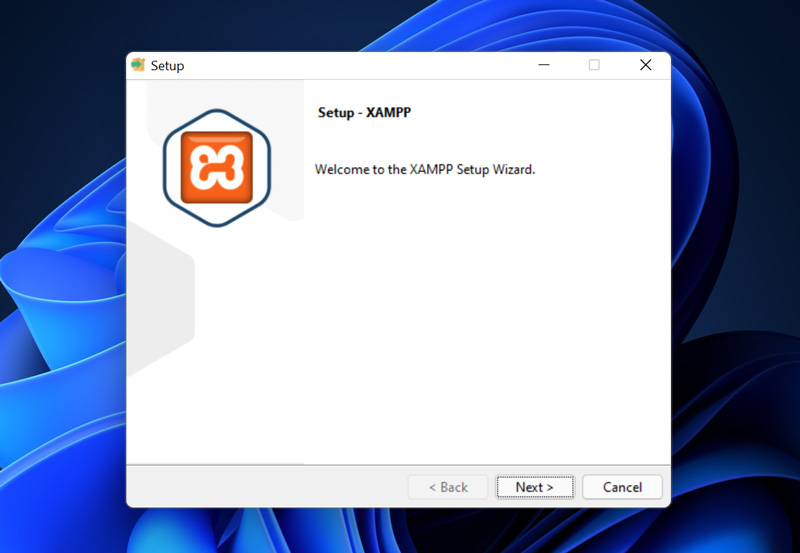
Once the installer is downloaded, launch it to start the installation process. Simply follow the on-screen instructions and always click Next.
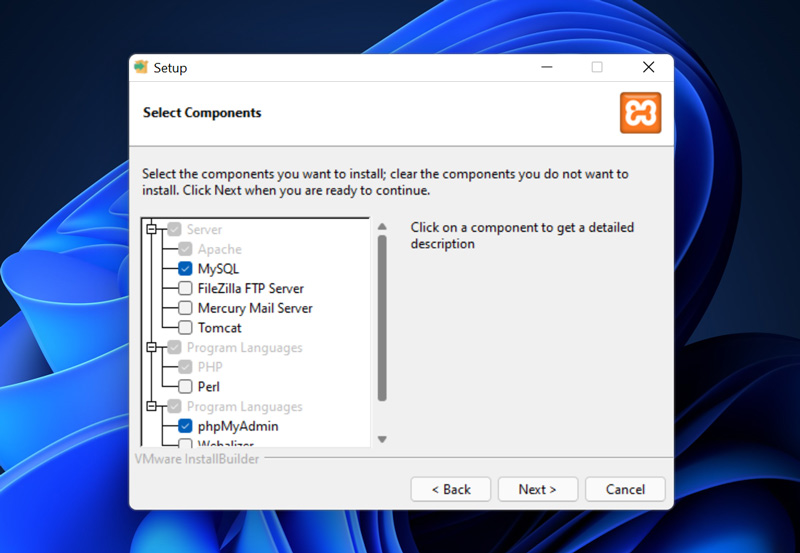
When prompted to choose which components to install, choose only MySQL, Apache, PHP and phpMyAdmin then click Next.
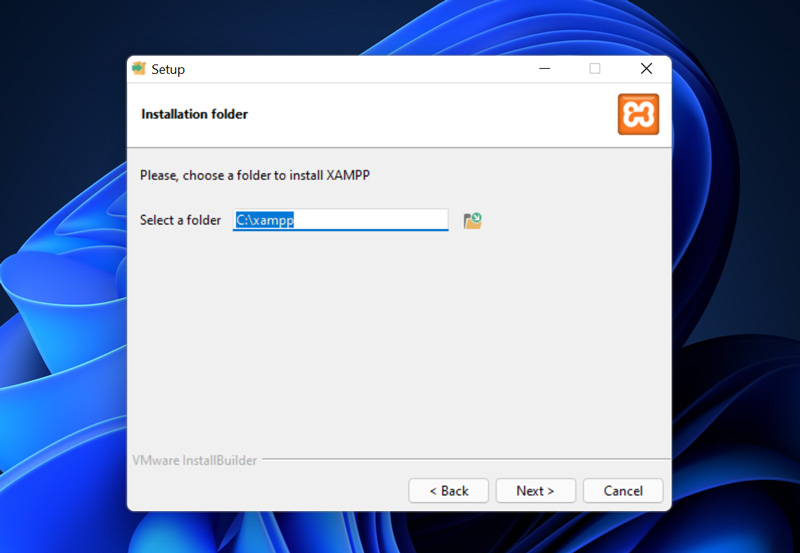
If asked to choose where Xampp will be installed, you can choose a different folder or keep the default option.
If you see a security alert from your antivirus, you can go ahead and click Allow access.
When prompted to Learn more about Bitnami for XAMPP, uncheck the box and click Next as this is not required to run WordPress.
Once Xampp is installed, launch the control panel and click Start next to Apache and MySQL modules.
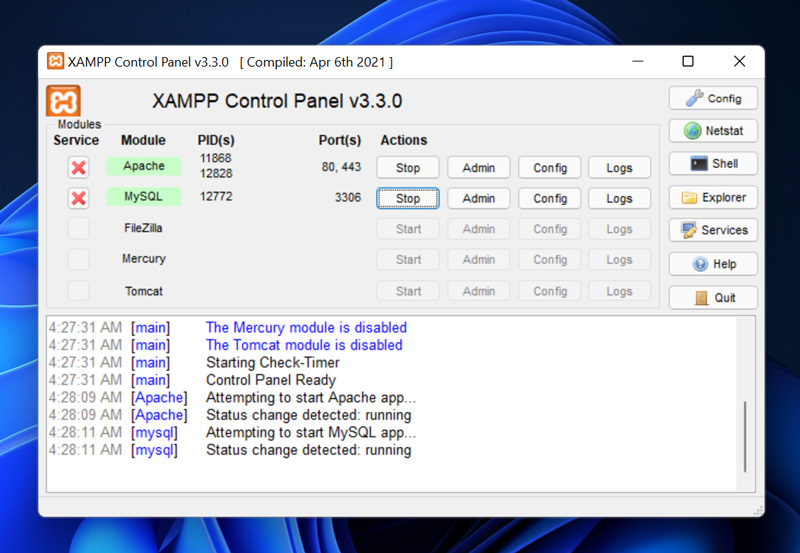
Once they turn green, visit http://localhost/ from your browser and you should see the Xampp dashboard page.
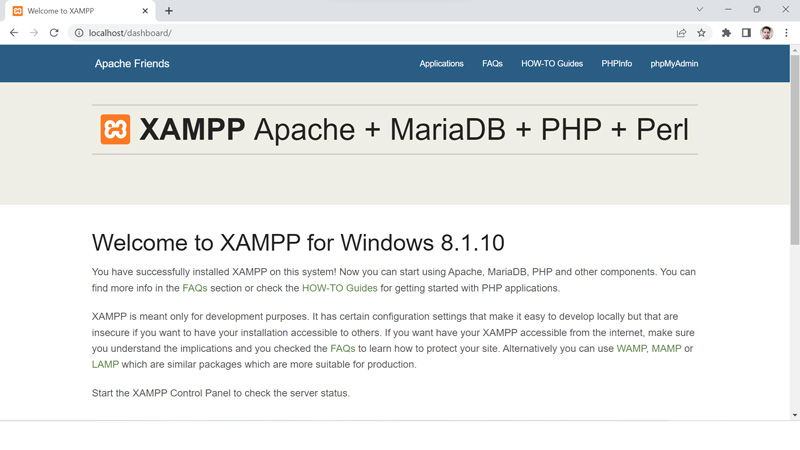
Congratulation! Now a fully functioning web server is running on your computer.
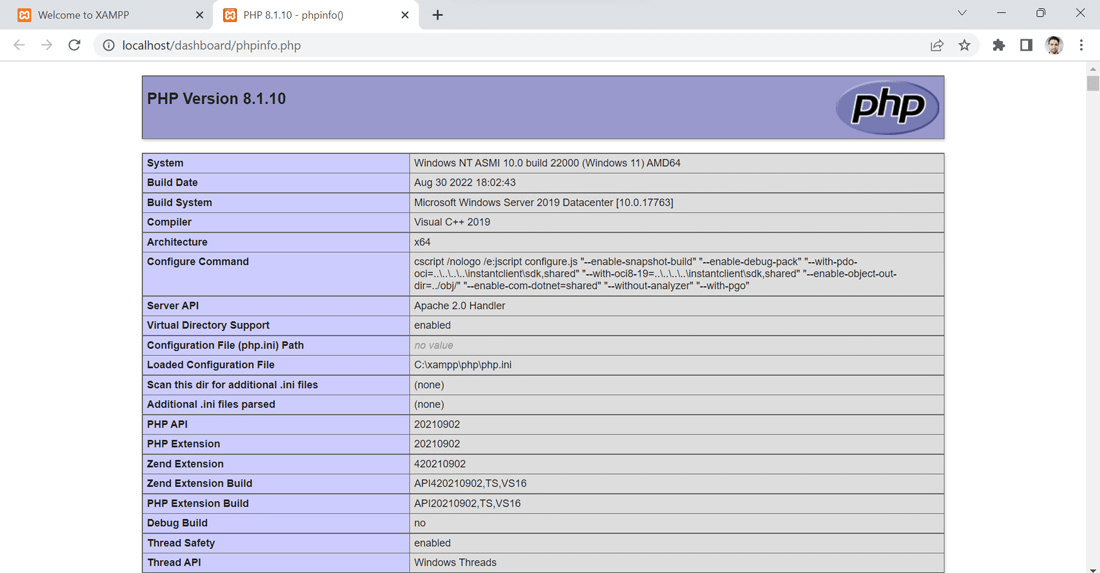
Feel free to check the PHPInfo link to see more details about the installed PHP version and its modules.
Also, you can check the phpMyAdmin page. This is a free web-based database management tool that we will need later to create the database.
How to Install Xampp on Linux?
If you are using Linux, the installation process is a bit different and probably you will need to get your hand dirty with the command line.
Check this guide if you are using Ubuntu. If you are using a different distribution of Linux, I am sure you can figure this out with a quick Google search. You are a Linux user after all!
How to Install WordPress on Localhost?
Now that you have Xampp installed on your computer, it’s time to download and install WordPress.
We will do this in 3 simple steps:
- Download WordPress
- Create a database
- Install WordPress
Step 1. Download WordPress
To download WordPress, go to the WordPress download page and download the most recent .zip file of WordPress.
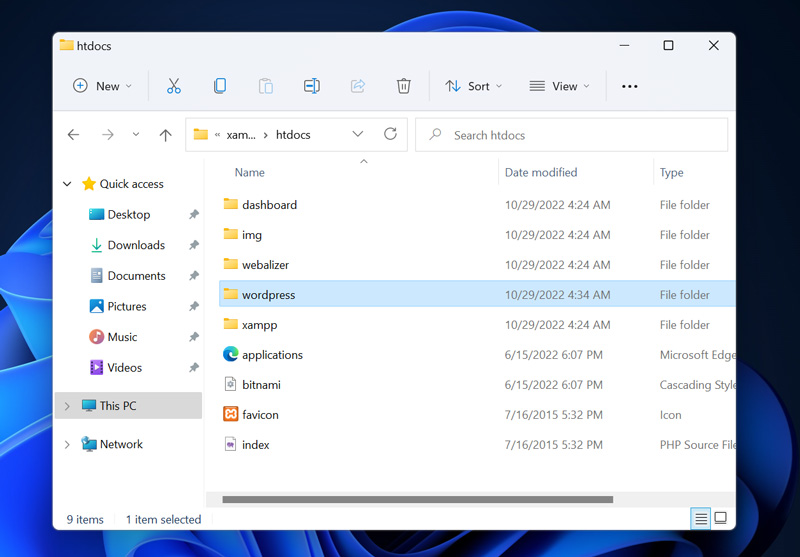
Then, navigate to the htdocs the folder which is directly inside the Xampp installation folder. The default Xampp installation location on Windows is C:\xampp.
Unzip the WordPress .zip file inside the htdocs folder. Your htdocs should look like this:
Step 2. Create a database
Remember phpMyAdmin from the previous steps? It’s a web-based database client that we will use to create the database.
To create the database for our WordPress website, go to the Xampp dashboard http://localhost/ and click phpMyAdmin.
Then click New from the left menu, choose a name for the database, and set the database collation to utf8mb4_general_ci. and finally, click Create.
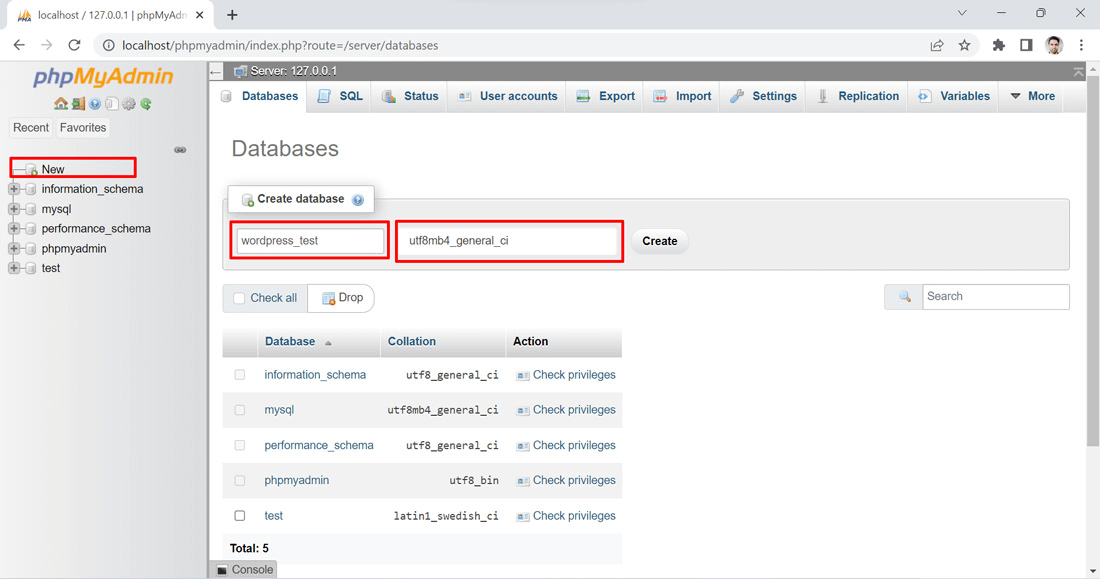
It’s important to choose UTF8 for the database collation as this will make non-English text appear correctly.
Now that your database is created, let’s install WordPress.
Step 3. Install WordPress
Before we can install WordPress, we need to tell it which database to use for storing all the data it needs.
To do this, open the WordPress folder you extracted earlier and rename the wp-config-sample.php file to just wp-config.php.
Now open this file you just renamed in your preferred code editor and do the following:
- Replace database_name_here with your database name
- Replace username_here with root (the root user has full access to all databases. I am using the root user here to keep this tutorial beginner-friendly, but you can create a dedicated user for each database you create).
- Remove password_here without the quotes. By default, Xampp on Windows uses a blank (empty string) password for the root user.
In the end, your wp-config.php should look like this:
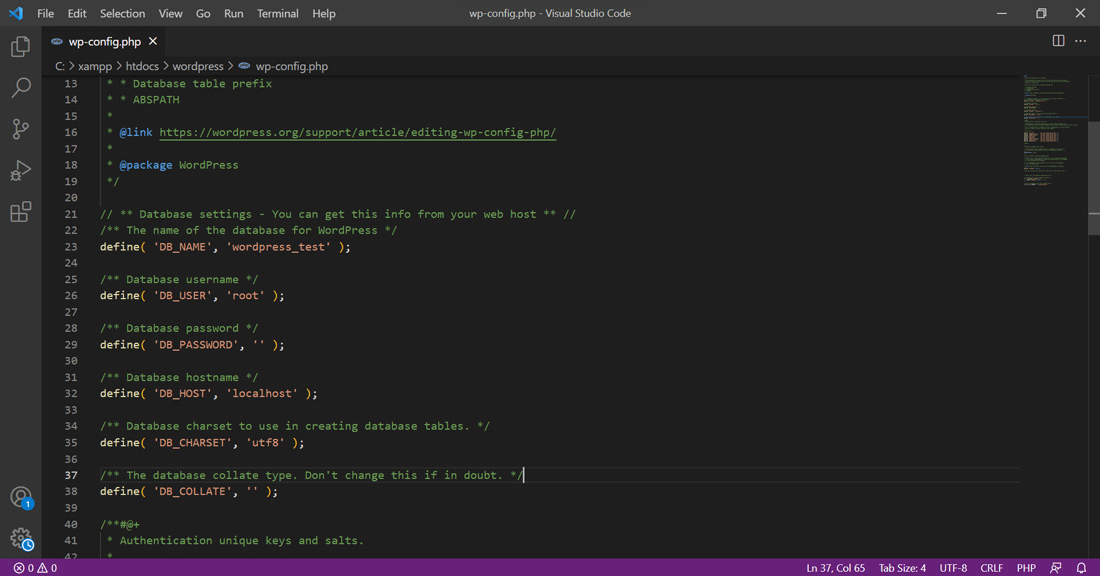
I am using Visual Studio Code editor for all my code editing. It’s my favorite code editor and can be extended using extensions just like WordPress! If you want to give it a try make sure to check my list of the best VS Code extensions for WordPress development.
Now, we are ready to install WordPress. Open this URL in your browser http://localhost/wordpress and you should be redirected to the WordPress installation screen.
If you renamed the WordPress folder extracted earlier from the Zip file, you need to change this URL accordingly.
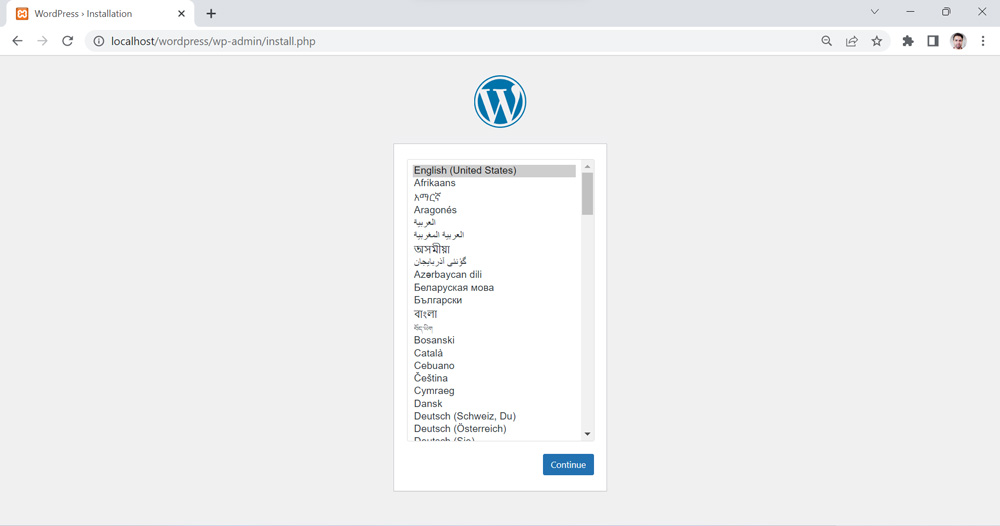
Next, choose a language and click Continue.
In this step, choose a title for your website and fill in the remaining fields as needed.
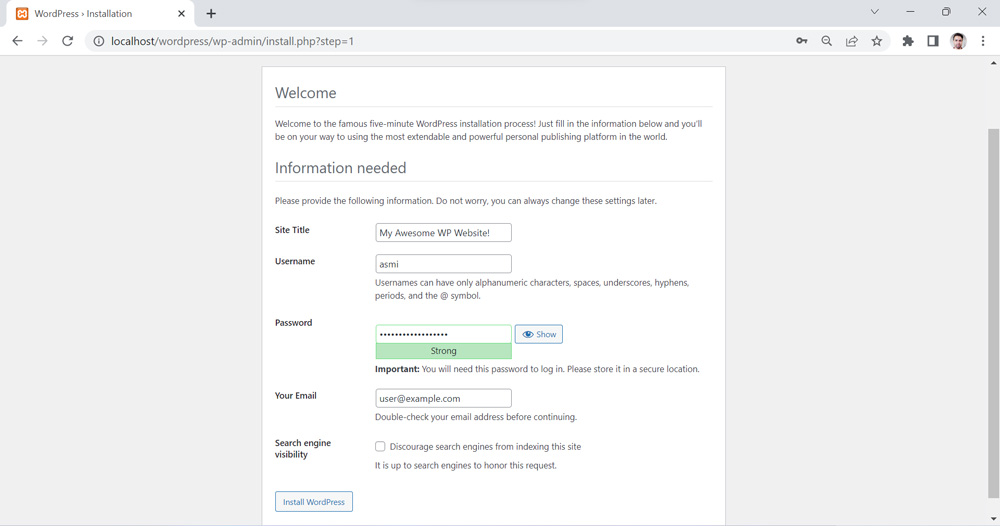
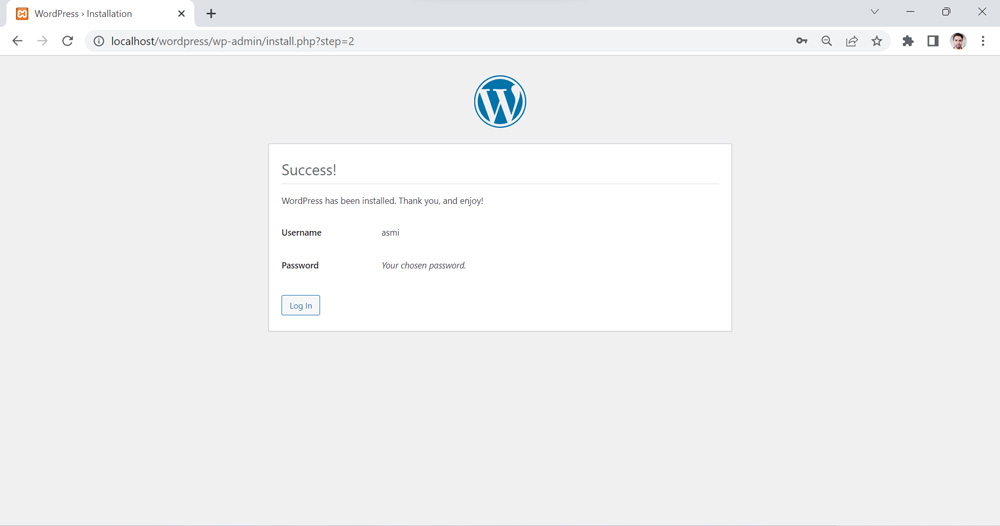
Once done, click Install WordPress and within seconds, WordPress will be fully installed. Just like that!
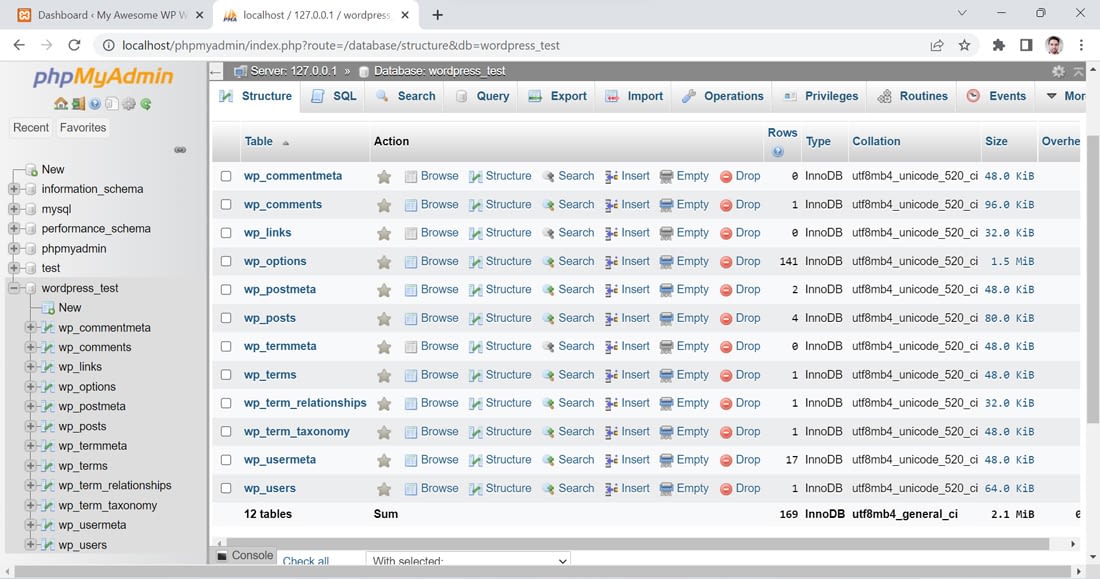
Now if you head back to phpMyAdmin and open the database, it will be already populated with many tables like this:
Now back to WordPress, if you follow the Log in link and log in using the username and password you set earlier, you will be redirected to the WordPress admin dashboard:
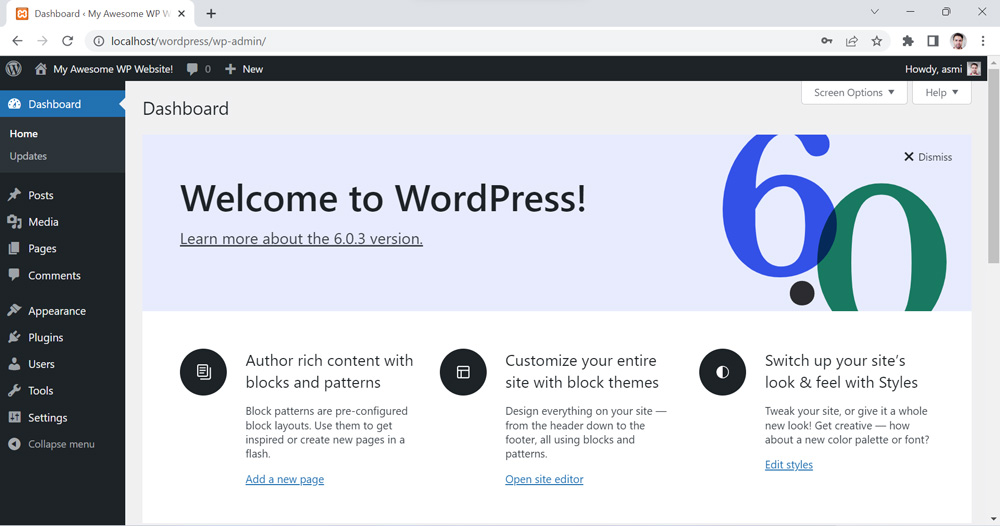
Awesome! Now you have a full version of WordPress running on your computer.
But that’s not all, I still have a few tricks to show you on how to optimize this setup for WordPress development. However, if all you want is to just install WordPress on localhost, then you can skip the rest of this tutorial.
How to Optimize Your Local Environment for WordPress Development?
How to use a custom domain on Localhost?
For one instance of WordPress, it’s ok to install it in a sub-folder on localhost. But the moment you start creating more WordPress sites, you will run into many issues because all these instances of WordPress are treated by the browser as one website and will all have access to the same cookies.
To fix this, we need to assign a custom domain to every WordPress website we create.
But how do you do this? Simple! We use Apache’s Virtual hosts which sound complicated but trust me they are not.
Let me show you how to set up a custom domain wordpress.local on the instance of WordPress you previously installed.
First, open the Xampp control panel and click the Config button then <Browse> [Apache].
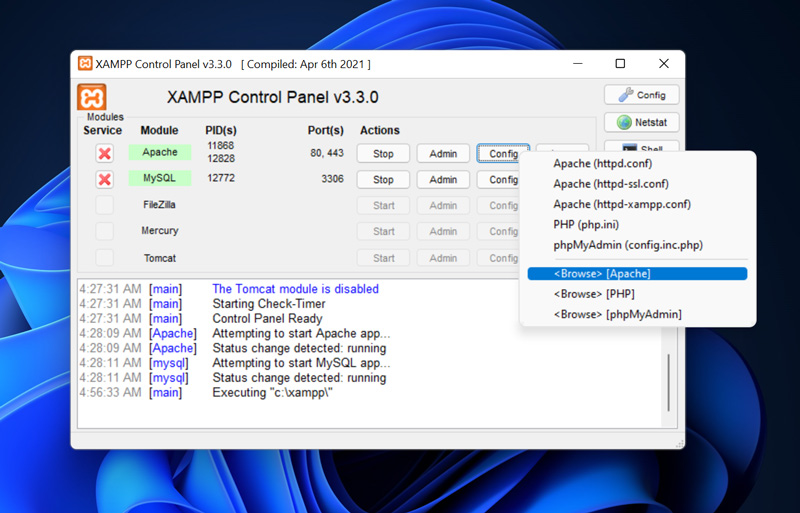
This will open the folder where Apache files reside.
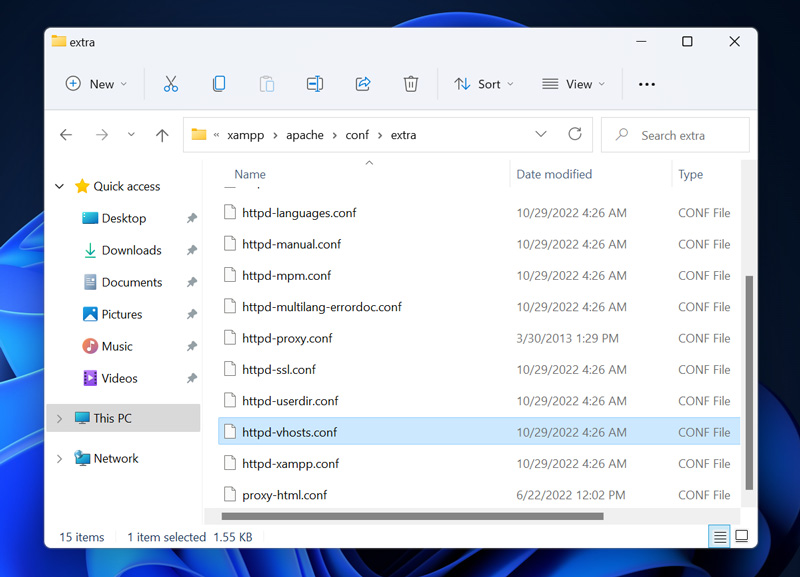
Find the file httpd-vhosts.conf inside the conf >> extra folder and open it using your preferred code editor.
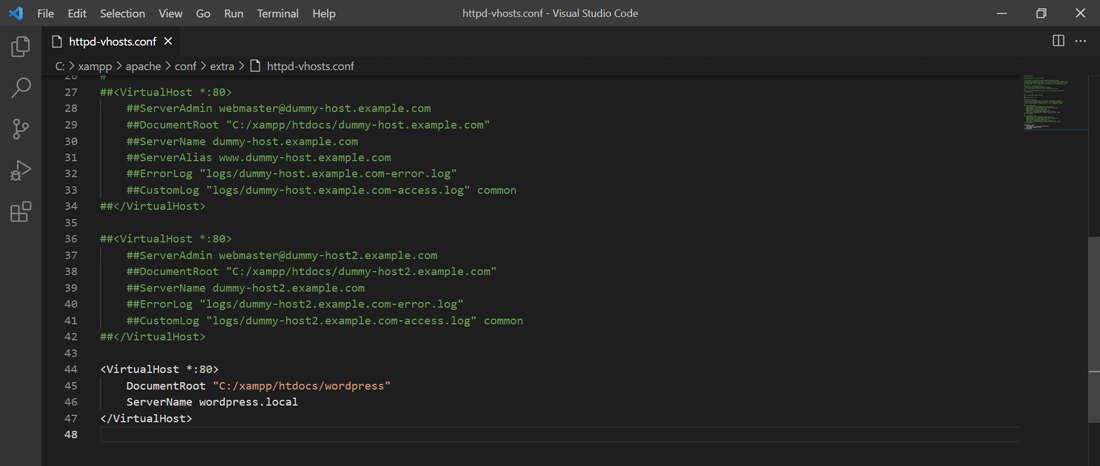
Now add the below code to the very bottom of the file (rename wordpress to your WordPress folder name if yours is different):
<VirtualHost *:80>
    DocumentRoot "C:\xampp\htdocs\wordpress"
    ServerName wordpress.local
</VirtualHost>
When finished, your file should look like this:
Save your changes and now open the hosts file which is located at C:\Windows\System32\drivers\etc\hosts on Windows.
Edit the hosts file by adding wordpress.local right after localhost like this:
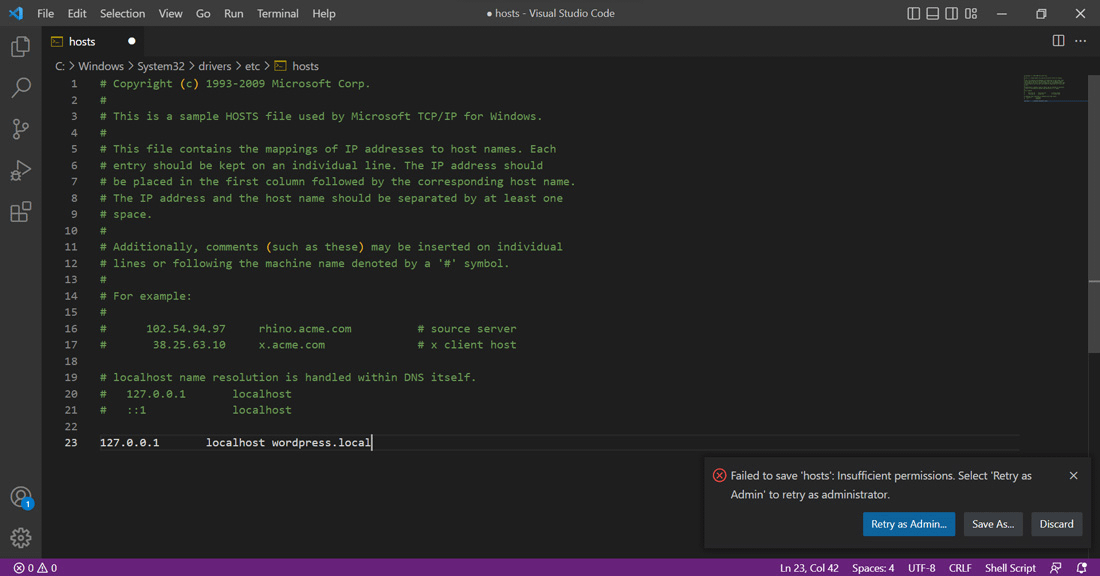
If the editor fails to save the file, click Retry as admin or close it and run it as administrator.
Now we just need to update the WordPress home URL and site URL from the database.
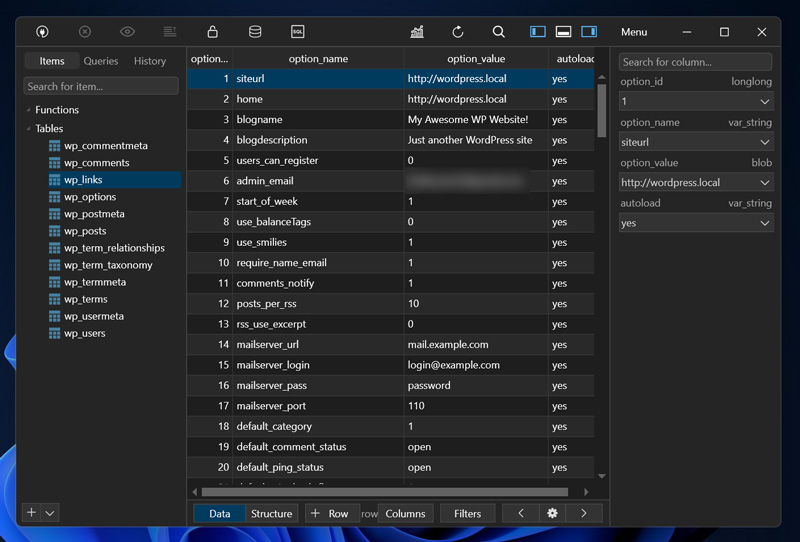
To do that select the database in phpMyAdmin and open the wp_options table and edit siteurl and home options by setting the option value to the new URL, like this:
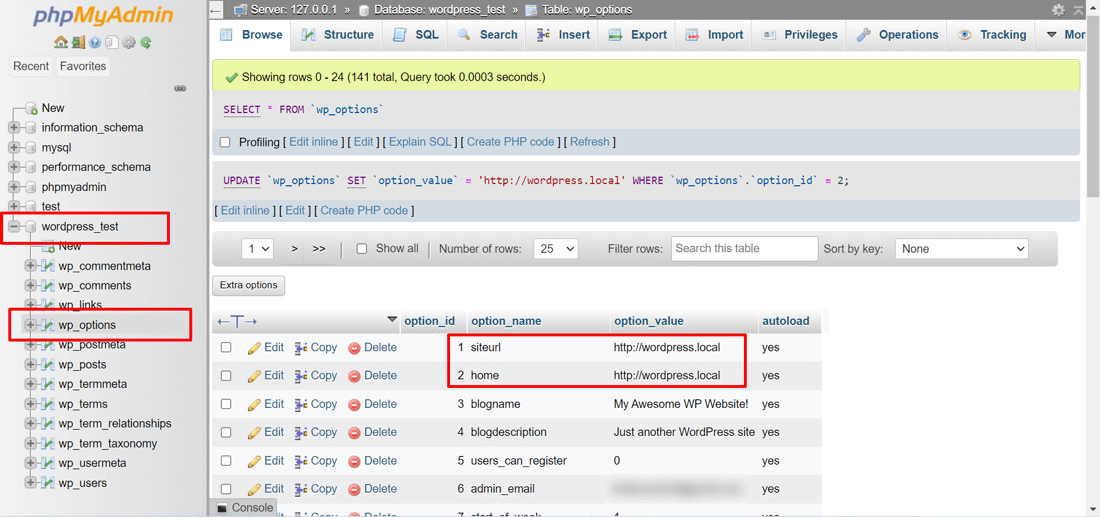
To edit a cell, double-click inside of it. phpMyAdmin saves automatically when you click outside a currently open cell.
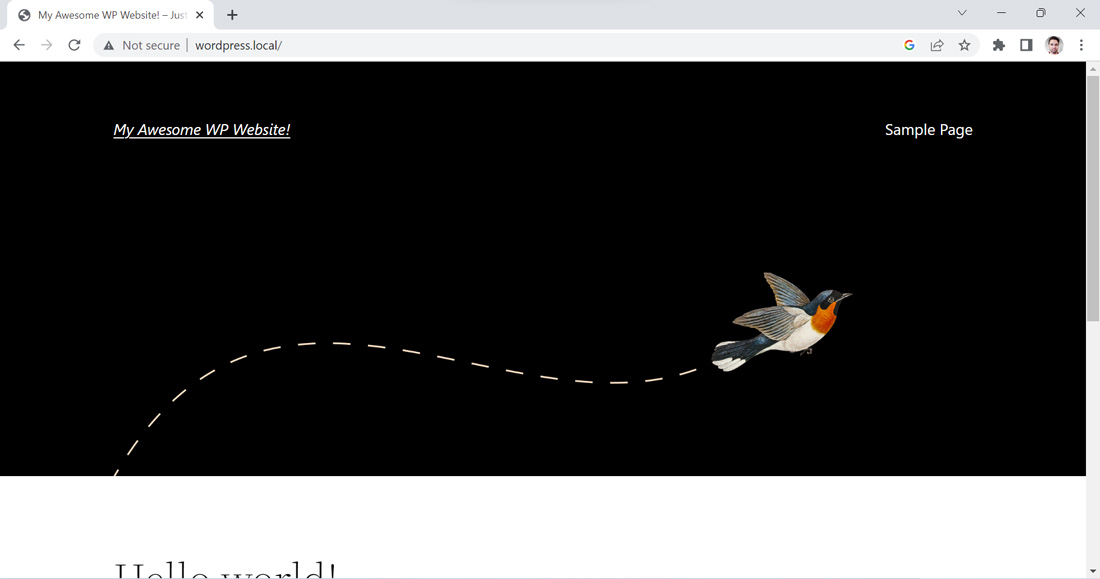
That’s all! Now if you visit the old URL http://localhost/wordpress you will receive an internal server error. That’s because the website has been moved to a different location.
The new URL of your website is now http://wordpress.local unless you changed to something else or your virtual host is not configured correctly.
How to increase the maximum upload size and PHP memory limits?
Sometimes when you try to upload large files or install a large plugin or a theme, you may receive errors like “exceeds the maximum upload size for this site” error because the file you are trying to upload using the media uploader exceeds the maximum size allowed by your server configuration.
For instance, if you go to the Media uploader and click Add new to upload a file, the maximum file size you can upload will appear under the upload button.
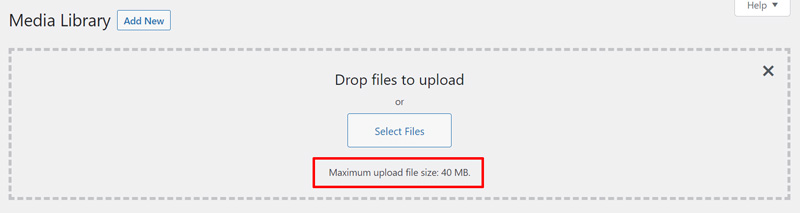
By default, the maximum upload size in Xampp is 40MB. This is enough for most WordPress production servers. However, for a local development environment, I always increase it to 256 or more.
There are also other PHP limits you should increase for an optimal configuration. Don’t worry about the server security here because only you have access to it.
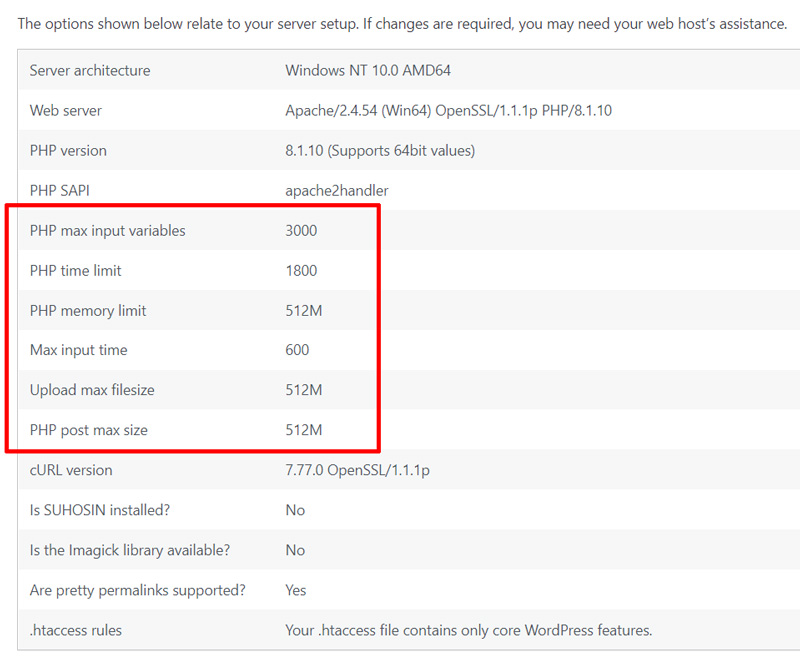
To view your current PHP limits you can always check the PHPInfo page we saw previously. However, a more convenient method is to check the Site Health Info page which you can access from the WordPress dashboard.
If you check the Server section, you will see a table like this (the important ones are highlighted in red):

- To increase the maximum upload size, you need to increase both the Upload max filesize and PHP post max size.
- Other limits like the PHP max input variables control how large your server requests can be. For example, if this variable is low, you won’t be able to create large menus in WordPress.
To increase these limits, we need to edit the php.ini file that comes with PHP. To do that, open the Xampp control panel and click Config next to the Apache module then click PHP (php.ini).
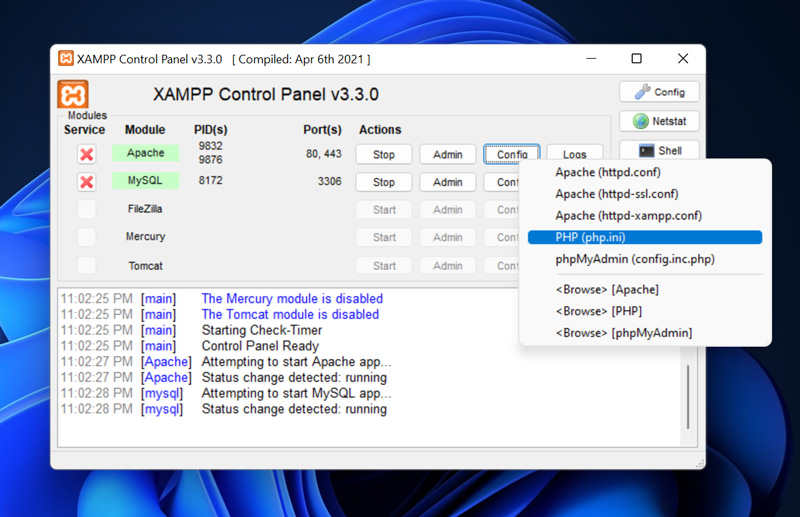
This will open the configuration file in your default text editor. If you want to use a different editor, you can always find the php.ini in C:\xampp\php\php.ini.
Now edit the file and set their values like this:
max_execution_time=1800
max_input_time=600
upload_max_filesize=512M
memory_limit=512M
post_max_size=512M
max_input_vars=3000
max_input_vars are commented out using a semicolon (;). So you need to delete the semicolon to make them effective.For the changes to take effect, save the file then restart Apache from the Xampp control panel.
If you check the Site Health Info page again, you will see that your PHP memory limits have increased.
Now you can upload larger files to WordPress and its PHP files can execute for a longer time before it times out.
How to use TablePlus (better than phpMyAdmin) with Xampp?
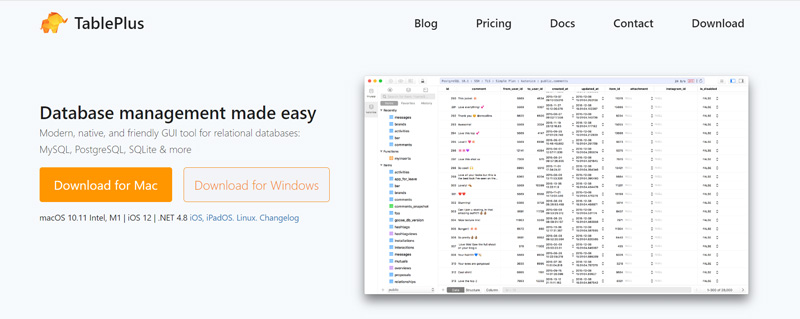
TablePlus is a native database management client available for Windows, Mac, and Linux.
I prefer TablePlus over any other database management software I tried before like phpMyAdmin, Sequel Pro, MySQL Workbench, or DBeaver.
phpMyAdmin is a web-based app so it’s always limited by the resources allocated by the browser and the web server running it.
TablePlus is superior because it’s a native app that runs directly on your operating system. So it has access to far more resources. This is more apparent when importing or exporting large databases.
Installing TablePlus is very simple, you just need to download the installer for your operating system from their official website and install it like any other app.
When you launch TablePlus, you will always get a list of all configured database connections.
Local (local) is your localhost database server which in our case is the MySQL server that comes with Xampp.
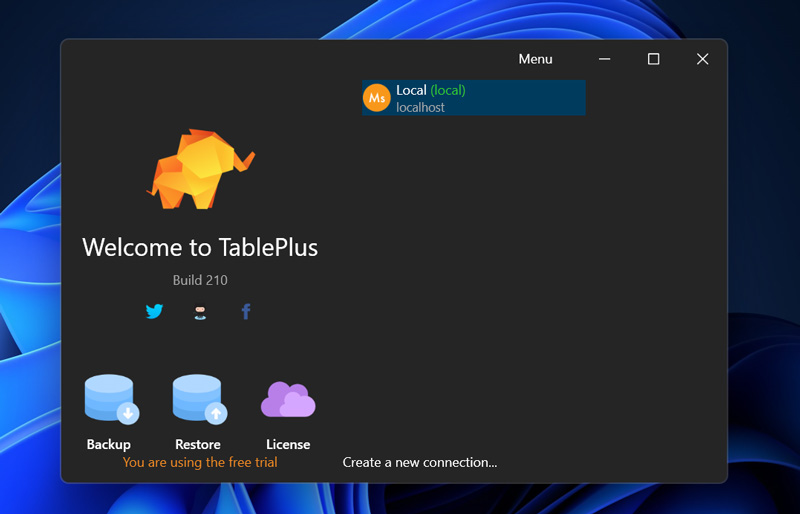
Since our MySQL server’s root user has no password, TablePlus should open the local connection without any configuration. However, if the root user has a password that TablePlus couldn’t find, it will ask you to enter it.
Once you open the local connection, you will have access to all the databases on this server including the one we created earlier.
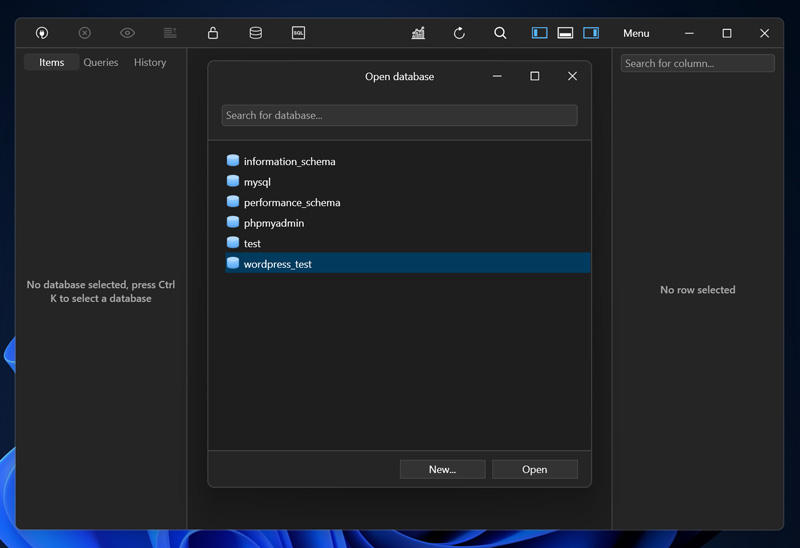
If you open your database in TablePlus, you will get a list of all its tables which you can open in separate tabs and edit them as you please.
That’s all there is to it!
Summary
Xampp works very well as a local WordPress development server for both beginners and advanced users. It comes with a powerful web server, a MySQL server, and PHP. What else do you need to run WordPress?
We have covered in this tutorial in detail how to install and run WordPress on localhost. Also, we learned how to optimize our local development environment by increasing the PHP limits and installing a better database management client.
Personally, I used Xampp for years on Windows but currently, I am using a custom LAMP stack on Mac using Homebrew because I can install multiple versions of PHP, MySQL..etc with different configurations and switch between them easily. Unless you need a setup like this, I will always recommend Xampp to you.
If you have any questions or still need help with Xampp, I will be happy to assist you! Let me know in the comments below.
If you liked this article, then please subscribe to our YouTube Channel for WordPress video tutorials.
Fantastic guide, thanks.
All was going well until the virtual host. I triple-checked and all is done as you said, but when I go to wordpress.local I get a PRTG Network Monitoring page (??). Never even heard of PRTG before, but it wants me to log in. Weird.
Hello Gary, you’re welcome!
That’s weird, maybe the software was installed on your computer and added a redirect to their website. If you open your hosts file, if you have never edited it before, you should only see a large comment block like in the screenshot on this post without any active entries. Or at least you should see websites that you recognize.
بسیار عالی و کارآمد بود
Thanks!