In this post, I will show you how to force HTTPS on WordPress without a plugin by editing the .htaccess file or with a plugin if that’s more convenient for you.
But first, make sure your site is already configured to redirect www to non-www or vice versa depending on your preference.
When your SSL certificate is installed properly, you will be able to visit the secure (HTTPS) version of your website.
However, your site’s visitors are still able to access the non-secure (HTTP) version of your website by either typing the URL directly or by following an old link to your website.
That’s why you need to force HTTPS on your WordPress website to ensure your visitors are always served the secure HTTPS pages.
HTTPS is more important than ever nowadays. So much important that Google started using it as a ranking factor years ago.
HTTPS is important for security too. By using HTTPS, you ensure sensitive data of your website’s visitors like login details and personal information are securely encrypted. Without it, your user’s information can be easily compromised.
Chrome users will even see a warning in the search bar if your website pages are not served with HTTPS which will cause your site to lose traffic as a result.
Are you convinced now? Ok, let’s see how you can fix it on a WordPress website…
How to Force HTTPS on WordPress without Plugin?
Step 1. Change Your Website URLs from HTTP to HTTPS
Start by logging into your WordPress admin dashboard.
From your dashboard, go to Settings > General and update WordPress Address (URL) and Site Address (URL) as follow:
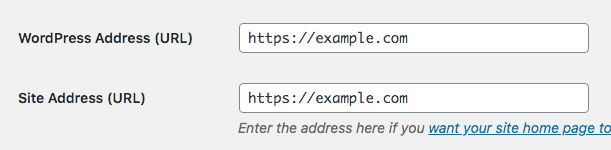
Simply replace http with https.
Don’t forget to save your changes.
That’s it, now to the next step…
Step 2. Edit Your .htaccess File
Your .htaccess file is located in the root folder of your WordPress installation. Usually, this folder is called public_html.
You need to open this file with the code editor of your choice and add the below code (preferably at the very top).
If you don’t know how to edit the htaccess file, check the next section where I show you 3 different methods on how to edit the file.
# Force HTTPS on all pages
<IfModule mod_rewrite.c>
RewriteEngine On
RewriteCond %{HTTPS} !on
RewriteRule (.*) https://%{HTTP_HOST}%{REQUEST_URI} [R=301,L]
</IfModule>
If your .htaccess file contains this code:
# BEGIN WordPress
<IfModule mod_rewrite.c>
RewriteEngine On
RewriteBase /
RewriteRule ^index\.php$ - [L]
RewriteCond %{REQUEST_FILENAME} !-f
RewriteCond %{REQUEST_FILENAME} !-d
RewriteRule . /index.php [L]
</IfModule>
# END WordPress
Just add it right before it, so it looks like this:
# Force HTTPS on all pages
<IfModule mod_rewrite.c>
RewriteEngine On
RewriteCond %{HTTPS} !on
RewriteRule (.*) https://%{HTTP_HOST}%{REQUEST_URI} [R=301,L]
</IfModule>

# BEGIN WordPress
<IfModule mod_rewrite.c>
RewriteEngine On
RewriteBase /
RewriteRule ^index\.php$ - [L]
RewriteCond %{REQUEST_FILENAME} !-f
RewriteCond %{REQUEST_FILENAME} !-d
RewriteRule . /index.php [L]
</IfModule>
# END WordPressHow to Edit the .htaccess File? (3 Methods)
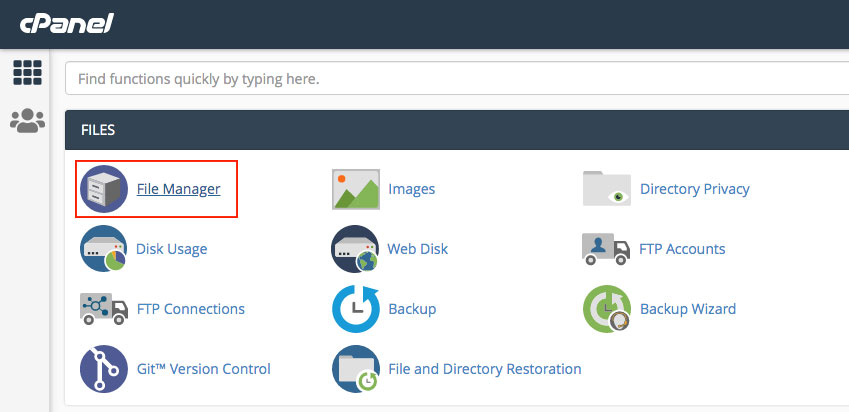
Method #1. Editing .htaccess from cPanel
If you are using cPanel, login into your account, and choose File Manager.
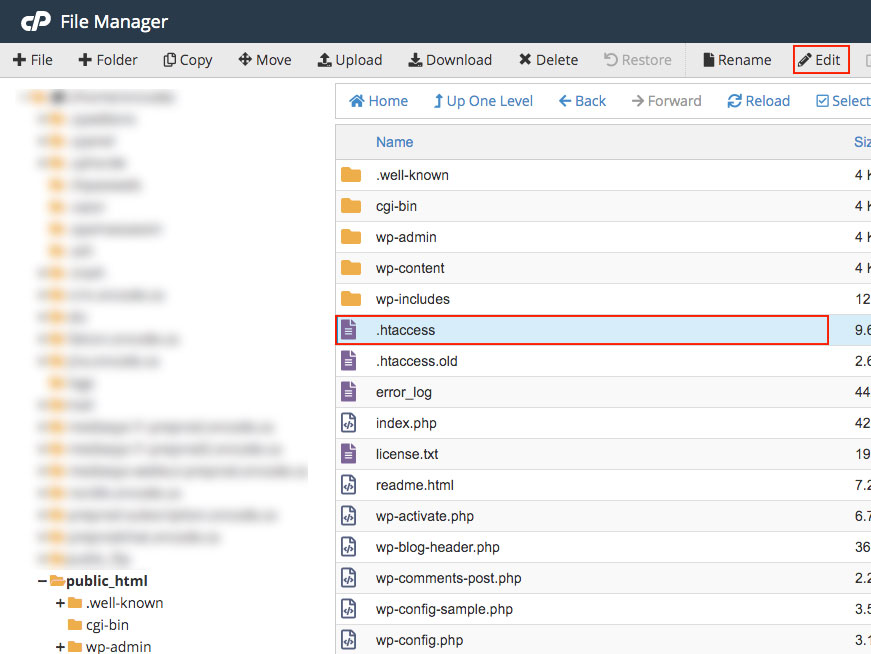
Once you are inside the File Manager, navigate to the public_html folder, and choose the .htaccess file then click Edit from the top right corner.
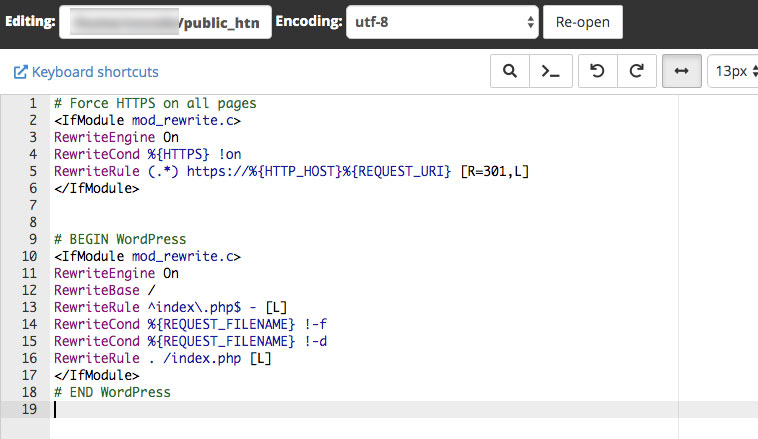
When the Edit screen is open, click Edit without changing anything.
Now add the code above code and click Save Changes.
Method #2. Editing .htaccess Using FTP
If you prefer using FTP instead, you can use a program like Filezilla to download the file to your computer and use a code editor to edit it.
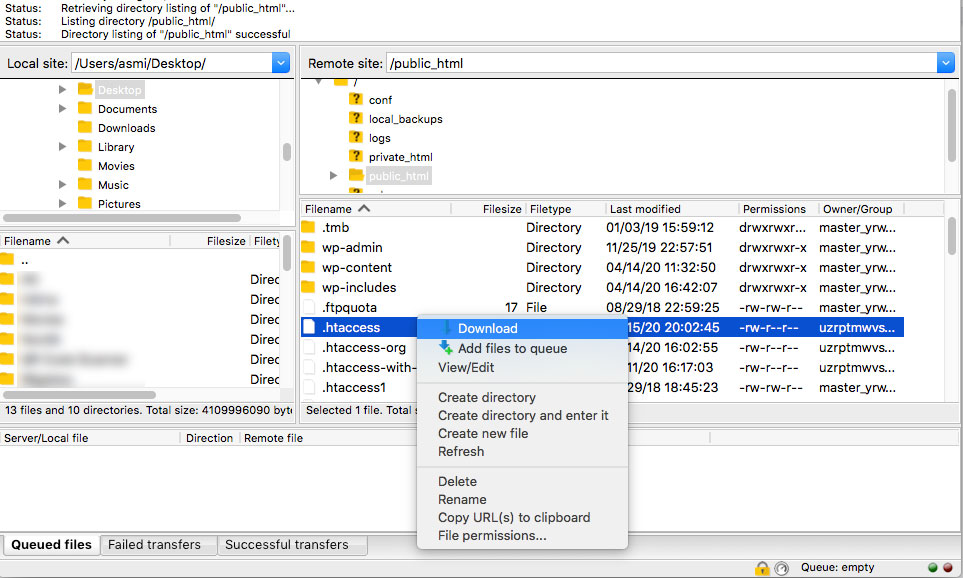
When done, upload the file again to overwrite the existing one.
Method #3. Editing .htaccess Using a Plugin
I don’t like using a plugin when not necessary, but in this case, you can use a lightweight plugin to edit the .htaccess file and uninstall it when you are done with it.
My plugin of choice to edit the .htaccess file is Htaccess Editor by WebFactory.
Simply download the plugin and install it on your website.
After you activate it, go to Settings >> WP Htaccess Editor and add the code then click Save Changes to apply the changes.

How to Force HTTPS on an Nginx Server?
Most servers are using Apache, but if your site is running on an Nginx server, updating the .htaccess file will change nothing.
Instead, you need to add this code to your Nginx configuration file (don’t forget to replace example.com with your website domain):
server {
    listen 80;
    server_name example.com www.example.com;
    return 301 https://example.com$request_uri;
}
If you don’t know how to edit your Nginx configuration file, here is a beginner-friendly guide by Linode.
How to Force HTTPS on WordPress with a Plugin?
Editing any files in WordPress might cause issues or even worse, make your website go offline.
If you are a beginner and don’t want to edit the .htaccess file manually, you can use a simple WordPress plugin that will force HTTPS on your website automatically.
The plugin I recommend for this job is Really Simple SSL.
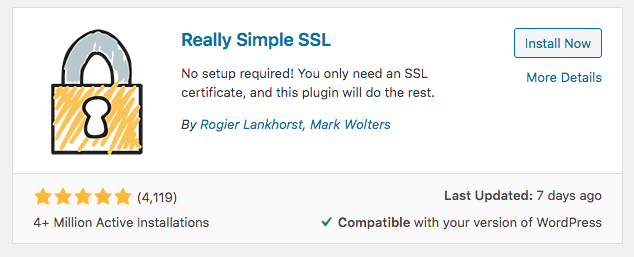
After you install and activate the plugin, you just need to click Go ahead, activate SSL! and the plugin will force HTTPS on your website. No further steps are needed.
Force HTTPS on Login and Admin Pages Only
I don’t know why you would want this, but if you want to force HTTPS on login and admin pages only, this is possible by editing the wp-config.php file.
Open your wp-config.php file and add this line:
define('FORCE_SSL_ADMIN', true);Right before this line:
/* That's all, stop editing! Happy publishing. */
How to Fix “Mixed Content” Errors?
When you switch over to HTTPS, you should see the green padlock. in your browser search bar if you are using Chrome, Firefox, or any modern browser.
However, if this is not the case, then your website has a “mixed content” issue that you need to fix.
What is Mixed Content
Mixed content errors and warnings occur when your browser is loading the page’s content and files over both HTTP and HTTPS.
A typical mixed content example is when a page (https://example.com) loaded over HTTPS contains a link to an HTTP image (http://example.com/image.png).
These errors appear in the Chrome DevTools like this:
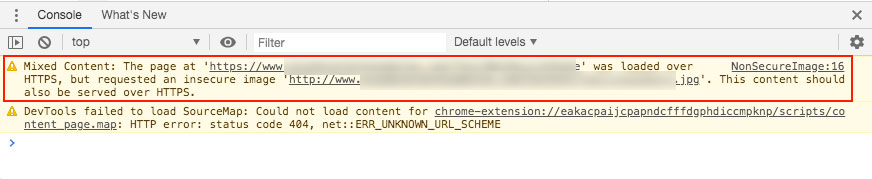
In Chrome, you can open the DevTools by right-clicking anywhere on the page and choosing Inspect. Click the Console tab to view mixed content errors and warnings.
How to Fix Mixed Content Errors?
If you have mixed content errors after updating your website URL from the settings by replacing http with https, then you probably have HTTP links hardcoded into your site’s content in the database.
To search for these links and update them, we can use a free plugin called Better Search Replace.
Simply download the plugin from the Plugin directory and activate it.
Once the plugin is activated, go to Tools > Better Search Replace.
Now add your website URL to the Search for option (with http) and to the Replace with option (with https).
After that, you need to select the tables you want to look into. In this case, I recommend selecting all tables.
Click Ctrl+A on Windows or Cmd+A on Mac to select all tables.
Make sure you don’t have a forwarding slash on both URLs as shown in the screenshot below:
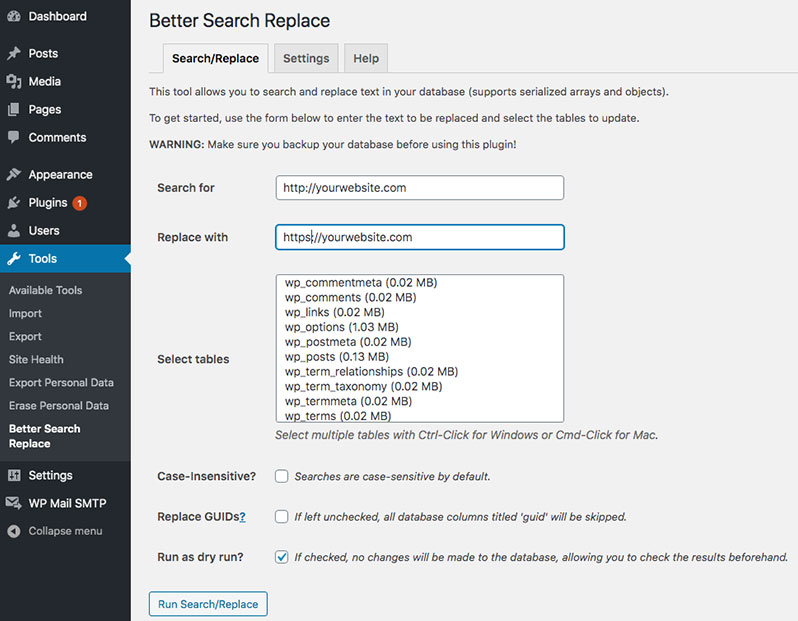
You should keep the Run as dry run option enabled.
Now click Run Search/Replace button.
The plugin now will search your database for all occurrences of your search phrase and give you a details table if you checked the dry run option without changing anything.
After you review the dry run table, feel free to click Run Search/Replace button again but this time without the dry run option enabled.
Once all your HTTP links are updated to use HTTPS, the mixed content errors should disappear and the green padlock should appear in the search bar.
However, it’s possible that you still have mixed content errors. In this case, you might need to check your theme files.
To keep this guide relatively short, I didn’t cover many things but if you need help or have questions, you are welcome to leave a comment below and I will be happy to assist you!
Conclusion
It’s true that enabling HTTPS on your website is a step in the right direction. However, by no means, you should consider doing this, your website is now bullet-proof against attackers and hackers.
In fact, what HTTPS and an SSL certificate will do to your website is encrypt data between your site and its visitors. That’s all.
To make your WordPress site secure enough you need to use a theme and plugins from reputable companies and developers, use a strong password, backup your site regularly, and much more.
I will write an easy-to-follow guide about WordPress security in the future so stay tuned.


![How to Redirect www to non-www in WordPress? [& Vice Versa]](https://mlzk6cmfo0m0.i.optimole.com/cb:tYpz.1c433/w:400/h:225/q:eco/f:best/https://devstash.io/wp-content/uploads/2020/11/wordpress-www-redirect.jpg)
Thank you,
Your manual method worked for me. I had tried it before but it wouldn’t play ball. I just got completely locked out of my website which was trying to access https:// except for the admin page after changing just the website and site urls in the admin panel.
You’re welcome! Glad I helped you